
Jun 21, 2015
Did you attend our “Snack and Shop” event in the store? We served treats made from a few gourmet food items we offer, and a clear favorite was the Honey Mustard Grilled Chicken, so we wanted to share the recipe:
Ingredients:
1/3 cup Dijon mustard
1/4 cup Savannah Bee Company Grill Honey
2 tablespoons plain yogurt
1 tsp. steak sauce
4 skinless, boneless chicken breast halves
Directions:
Preheat the grill to medium heat. In a shallow bowl, mix the mustard, honey, mayonnaise, and steak sauce. Set aside a small amount of the honey mustard sauce for basting, and dip the chicken into the remaining sauce to coat. You can let the chicken marinade in the sauce for a few hours (covered, in the refrigerator) or you can go ahead and grill immediately. Lightly oil the grill grate. Grill chicken over indirect heat for 18 to 20 minutes, turning occasionally, or until juices run clear. Baste occasionally with the reserved sauce during the last 10 minutes. Enjoy!

{original recipe from Savannah Bee Company}

Jun 21, 2015
Some weekends, the best way to beat the Texas heat is to whip up a batch of easy frozen margaritas. This recipe is tried and true (from my friend Kate), and I love that this recipe is super easy (only 3 steps), delicious, and you can adjust the alcohol content to your liking. It’s also not too sweet, which I prefer.

1-2-3 Easy Margaritas
You will need:
1 can frozen limeade concentrate
Tequila (preferably Sauza Silver)
Gin (I like Hendrick’s)
Grand Marnier
Ice
Margarita Salt to rim glasses (optional)
Sliced limes for garnish

Directions:
1. Throw the can of frozen limeade concentrate into the blender.
2. Fill the blender with 2 parts Tequila + 1 part Gin + a shot of Grand Marnier – you can make it as weak or as strong as you like, just keep the proportions in this ratio.
3. Add ice until you get the consistency you desire.

Using a slice of lime to rim the edge of the glass, place face-down in the margarita salt and give it a good twist. Pour the margarita mix in the glass and serve cold! Garnish with a lime wedge if desired. See now, wasn’t that easy?

Jun 17, 2015
As spring shifts into high gear and Mother’s Day, Father’s Day and Graduation draw near, we need more room for greeting cards – we have cards out the wazoo!

To solve the problem, this weekend we put a little muscle into it and added two more sections of shelves to our greeting card corner.


The new section will be our “Featured” area – if you’ve seen a card posted somewhere on social media, this is where you can find it. Quickly and easily.
Now we can get out even more of the cards you need for this busy season of life!


Jun 16, 2015
Every May when I board a plane for NYC to attend the National Stationery Show, I get “first day of school” jitters. I’m anxious to see what new products I discover, nervous that the trip will be worth the time and expense (plus time away from work), and downright excited for the show – and great restaurants!

This year I went with a slightly different focus in mind – instead of invitations, I was on the hunt for greeting cards – and lots of them. After the “The Switch” last April, our greeting card sales have skyrocketed. It’s wonderful news, but now the pressure is on. We love when customers tell us we are their go-to place for cards – we just can’t let them down now!

This year’s show did not disappoint in the greeting card department – we found several new lines and had great response to sneak peeks we posted on Instagram (@barquegifts). Here are a few discoveries that will make their way to our shelves over the next few months:


 Cards from: Emily McDowell / Paper Bandit Press / Ladyfingers Letterpress / McBitterson’s / Farewell Paperie / 6.25 Paper Studio / Paper Bandit Press / Paisley Tree Press / Paisley Tree Press
Don’t you just love these Social Preparedness Kits from Egg Press? The little fiberglass tray can be used as a catch-all once the stationery is gone. Brilliant!

And this adorable onesie from Lionheart Prints? Awe… (Also available in pink – coming soon).

NSS is such a great place for inspiration too! I probably stared at this booth display wall from Smock for at least 10 minutes.

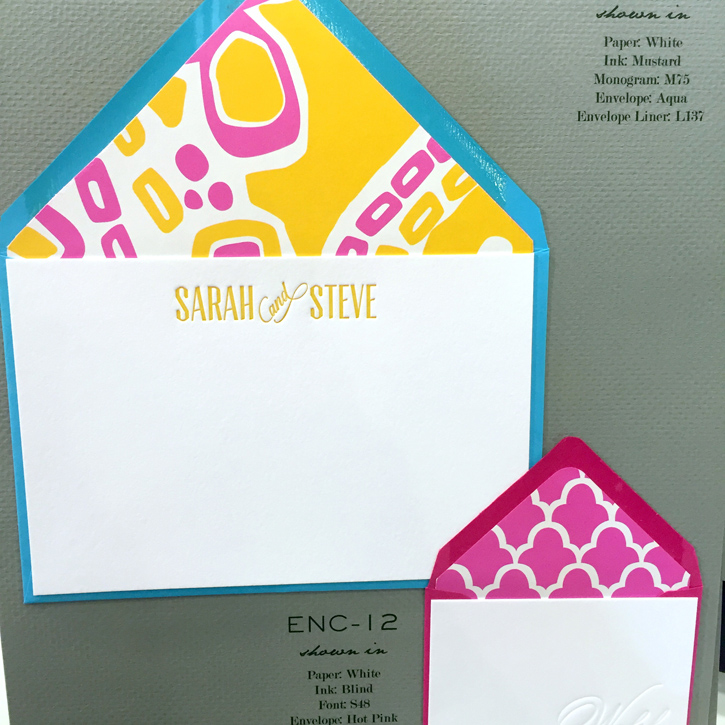
And finally, I ordered personalized stationery albums from Haute Papier. Man oh man, the stock is high quality and really sharp – and colorful envelope and liner options really send it over the top!
My personal award for the Most Startling Card goes to this one from Ghost Academy… Yes, it pushes the envelope a bit (I shy away from the F word – my grandma shops with me!), but I just couldn’t stop laughing at it. So of course it’s on order.

This trip was especially fun because my friend Christie from Stationery Academy joined me to walk the show. I told her it wouldn’t be a trip to NYC without good food, and she was more than happy to be on board with that. For lunch on Saturday, we got our NYC pizza fix at John’s Pizzeria in Times Square, near our hotel.
Reservations for dinner at Saxon + Parole will definitely be happening again. The food was delicious and the atmosphere/decor was very creative and fun. (Our favorite dish of the night was a pot of chicken liver mousse, red currant, and pepper jelly served with toast – highly recommend it.) 
On Sunday after walking the show, Christie and I attended a lovely Stationery Academy Alumni Soiree at Kari Joy’s Apartment near Central Park – isn’t her balcony space charming?

That was such a fun night – laughing and chatting with stationery friends – now that’s a special group of ladies right there!
On Monday, Jennifer joined Christie and I for dinner at Gato – Bobby Flay’s restaurant. It was amazing all around – fantastic food, a comfortable atmosphere and definitely a highlight of the entire trip. (If you’re going, I recommend the roasted Octopus and Avocado Fava Bean Salad!)

Great cards, hanging with my paper peeps and amazing food? Yep, I think this year’s trip to NSS was a success!
Apr 20, 2015
For Earth Day this year, we wanted to do something really fun for our customers… so we’ve made wildflower seed bombs!
The idea is that you can use the seed bomb in your own yard (or toss out the window when driving down the highway) to magically add a little beauty to the world around you.
To make your own Earth Day wildflower seed bombs, you’ll need the following (yields 20):
8.5 x 11 blue cardstock – about 12 sheets
8.5 x 11 green cardstock – about 6 sheets
a blender
water
local wildflower seeds
a mesh strainer
To begin, tear the paper (or use a paper shredder if you have one) to make small pieces of each cardstock color. 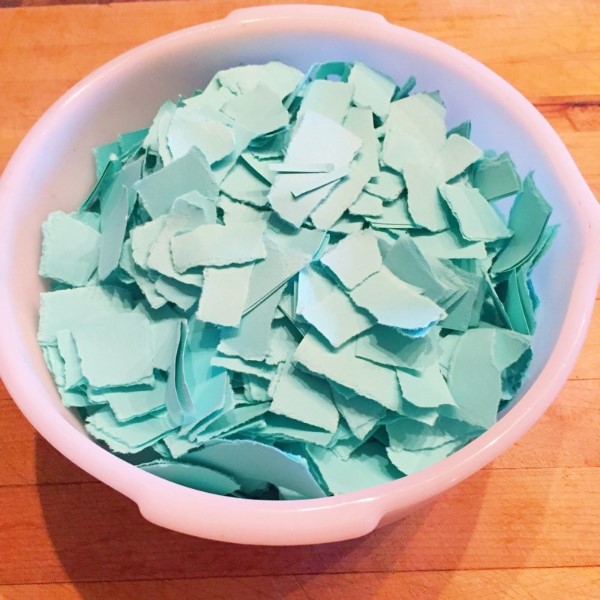
You can use any kind of paper (even newspaper), but I used an aquamarine colored cardstock, because I wanted it to look like a globe.
Add the paper shreds to a blender and cover with water. ** If you don’t have enough water, your paper won’t “pulp” – it’s always easier to drain the extra water than add it.
 Blend until the paper is a smooth consistency. Pour into a mesh strainer draped over a bowl (to drain the excess water).
 Use your hands to press the pulp until most of the moisture is strained.
 Repeat the same process for the green cardstock (which will serve as “land” on your Earth seed bombs later – so you’ll need far less)
 Once you have the paper pulp from each color completed, slowly add handfuls of wildflower seed until thoroughly mixed.
 I got my seeds from a local nursery, but you can find local wildflowers seeds online for your area by doing a search online.
 With the blue paper pulp/seed mixture create a small ball (squeezing the moisture out as you go).
 Add bits of the green seed mixture and reform in a sphere to create an “Earth” shape and look.
 Set aside each seed bomb on a cookie sheet to dry and repeat until all of the paper pulp is gone.
Drying update: If you need to speed up the drying process, turn a couple of fans on the seed bombs to help circulate air around them. Depending on their size, that should dry them in 6-12 hours.
We plan to give these out to the first 20 customers who come in on Earth Day (this Wednesday)… but think this would be a fun project for any family who wants to bring wildflowers to their community year-round!


