
Apr 22, 2013
When asked for my favorite, go-to dinner when the weather warms up, this recipe immediately comes to mind. It’s simple but tasty and a real crowd-pleaser! I’ve cooked what I lovingly refer to as “Brick Chicken” from holiday occasions like Father’s Day to Monday night dinner… it’s just downright delicious!
Brick Chicken
garlic (3-4 cloves), minced
red pepper flakes (to taste)
kosher salt
Fresh ground pepper
2 T chopped rosemary (or whatever herbs you have handy)
juice from half of a medium lemon
olive oil
Whole chicken, spine cut out and “flattened” ( I crack the joints in the middle so it will lay flatter on the grill)
2 – foil wrapped bricks
 Combine garlic, salt, pepper, lemon juice and rosemary with oil (around 2-3T, enough to make the mixture more fluid than a dry rub mixture). Rub it under the skin of the chicken on the breasts and legs.
Roast on the grill, breast side down with two foil covered bricks on top, over low to med-low heat. After 15-18 minutes, turn it over and repeat with the bricks. After about 20 minutes, the chicken should be done. Sometimes I flip it one more time just to make sure and leave on for a few extra minutes. It shouldn’t dry out, so don’t worry about that. Let rest for five minutes (if you can resist the smell!) then serve. Enjoy!
I know this “finished” pic isn’t very pretty (I like the skin really crispy), but I promise it’s juicy and delicious!
In the spring and summer, I like to pair this chicken with a tomato salad (mostly because it’s easy):
Tomato Cilantro Salad
1/2 cup chopped cilantro
1/3 cup extra virgin olive oil
3 T. white wine vinegar
2 t. Dijon mustard
1-2 small cloves of garlic
6 plum tomatoes sliced (I’ve also used the cherry ones, cut in half)
In a blender, combine the cilantro, oil, vinegar, mustard and garlic. Season with salt and pepper, and blend until vinaigrette is smooth. Drizzle tomatoes with vinaigrette and serve.

Apr 14, 2013
 I admit, I have a favorite corner of the house… Ok, technically it’s a hallway (a teeny tiny one). It’s the 4×4 space that leads into the master bedroom. It’s not much, but I pass by it more than any other area in my home on a daily basis.
Since I moved in, that “hallway” has been a work in progress. My friend Suzanne gave me the white table, and it happened to fit the space perfectly. I added a few knickknacks to the table and hung a blank frame as “filler” on the wall until inspiration struck.
Now, that “filler” has become the most versatile decoration in my home! It’s actually just a pre-made frame from Hobby Lobby that I had glass cut to fit, and I add a new masterpiece (created in Adobe Illustrator and printed at my local FedEx office) whenever I get the itch!
For “everyday” use, I enjoy a Randy Rogers Band quote from the song, “Let it Go”. It has sentimental meaning and keeps me grounded. For Halloween, I swap the frame to display my “If the broom fits, ride it” artwork. Over Christmas, I love seeing one of  my favorite holiday hymns, “Joy to the World” enlarged on the wall. Eventually, I plan to have a design for every occasion and season, and a few extras for in-between. Who knew there could be so much flexibility in one empty frame?
Over the past two years, the little table has collected a few more items- a wooden “violin”, a vintage leather jewelry box, and a Kodak Brownie Movie camera… along with more antique books (I can’t help but save them when I see them at estate sales). I never knew how much I could enjoy such a tiny corner of my home, but now that it’s a collection of items (and custom artwork) I love, it’s my very happy (small) space!

Apr 6, 2013
 I apologize for the lack of posts the past few weeks. I’ve been sick, and that means no energy for anything other than what’s necessary. Blogging might not have been, but cooking soup certainly has, so I thought you might enjoy one of the recipes I’ve been working on. Being a Southern gal, I’ve heard about chicken and dumplings being a “comfort food” all my life… but we never had the dish growing up because my dad wasn’t a fan. A few years ago I finally tried it and was surprised how delicious the flavors were! I wasn’t particularly keen on the consistency, so instead I’ve made a “soupy” version of my own. (Since I can eat soup any day of the week, especially when I’m feeling under the weather and need a little exta comfort!)
Chicken & Dumpling Soup
For the stock:
1/2 white onion
2 stalks celery
2 bay leaves
1 carrot, peeled
1 thyme sprig
3 garlic cloves
1 T. peppercorns
1 t. kosher salt
**I had leftover juice from baking a chicken, so that’s what I used as my stock base. If you don’t have that, you can add 6 cups of water and a) chicken breast b) chicken neck/leftover bones c) a little store-bought chicken stock for flavor
For the dumplings:
1 c. flour
1/2 t. baking powder
1/2 t. salt
1 egg
2-3 T. chopped chives
1/2 c. buttermilk (I didn’t have any, so I substituted 2% milk with the juice from half a lemon, plus a pinch of salt – it works about the same)
For the sauce:
3 carrots, chopped
2 celery sticks, chopped into crescent moons
1/2 onion, chopped
3 garlic cloves, minced
2 T. butter
2 T. extra virgin olive oil
2 bay leaves
1/4 c. flour
1 c. frozen peas
chicken meat, chopped (I used a whole chicken but you could just do 4 breasts)
1/2 c. half and half (or heavy cream if you’re so inclined)
chopped chives for garnish
salt and pepper
Instructions:
If you’re making the stock from scratch, fill a large stockpot with the liquid and ingredients listed above. Bring to a boil and then simmer for at least 30 minutes.
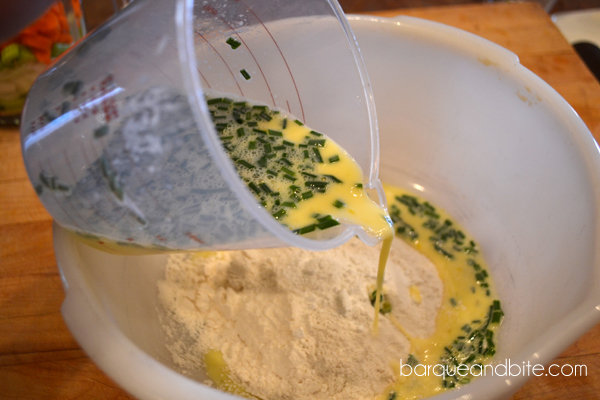 While your stock is simmering, make the dumpling batter. Start with flour, baking powder and salt in a medium bowl. In another bowl, whisk the egg, chopped chives and buttermilk. (As I mentioned before, if you don’t have buttermilk you can create the same taste with regular milk + lemon juice and a pinch of salt.) Pour the liquid into the dry ingredients and mix until combined. It will look a little thick, like pancake batter.
When the stock is done, the veggies should be soft (and the liquid will smell delicious). Strain the stock to remove the large chunks of veggies and herbs. Set aside.
 In a large pot over med-high heat, heat the butter and oil for the sauce. Stir in the garlic and cook for one minute (until fragrant), add the other veggies – carrots, celery, onion – and the bay leaves. Cook, stirring occasionally until soft (about 5 or 6 minutes). Add the 1/4 c. flour, stirring frequently to combine. Cook for about a minute after the flour is absorbed, stirring (don’t let it stick to the bottom of the pan).
Add all of the strained (or store-bought) chicken stock, a little at a time, constantly stirring and scraping up flour from the bottom of the pan. Add the frozen peas and turn to medium-low heat, cook for 20 minutes, then add the half and half (or cream) and chopped chicken. In small spoonfuls, drop the dumpling mixture to the pot, careful they do not touch (keep in mind they will expand). Cook for an additional 15 minutes or so, or until the dumplings are soft and puffy (but cooked through). Add salt and pepper to taste.
At the end, if you want to add some flour and whisk to make the sauce thicker, you certainly can. I did that the first time I made this dish, but discovered that the leftovers were just too mushy for my liking. Since then I’ve left it more liquid, which I like because it’s more “soupy” anyway. Garnish with chopped chives and serve. It’s so delicious – just like chicken pot pie in a bowl!
What is your favorite “comfort food”?
(Please note this recipe is adapted from Tyler Florence’s on Food Network)

Mar 21, 2013
Last year, mom and I attended our first Fall RoundTop Antiques Fair just to “check it out”, but we were overwhelmed by the options – way too many great finds! After much restraint, we ended up only buying what would fit in the car (err, or on it)… And that’s how we drove home with a “chicken coop” tied to the top of the Jeep. We sure did get crazy looks from passing drivers!

Come to find out, what I was calling a “chicken coop”, is actually a “nesting box”, according to my friend Tony (who has chickens). Tomato, tom-ahto, either way- it’s super cool. I originally wanted it for the store – to display cute grab-and-go-gifts – but we never seemed to have the wall space, so it just collected dust in the back. This January, we did a major clean-out at the store, and I finally decided to bring it home. I wanted to hang it on my back porch, but upon closer examination, my granddad thought it was too heavy, so moved on to Plan B.

My granddad is a Jack of all Trades. He’s an 82 year old cotton farmer, mechanic, electrician, plumber, inventor, and overall “fixer”. I love his resourcefulness (he’s a little like MacGyver), and I appreciate his… precision. Let’s just say anything he’s ever fixed or made is going to last awhile. Probably forever. He’s very thorough, and he likes things to be sturdy – like the swing set he made when we were kids with tractor plow bases (buried 6 feet in the ground). That sucker’s not going anywhere!

Once we decided that the nesting box was too heavy to hang, I sketched out a plan for my granddad to build a”stand” for it. He welded iron for the frame, and I couldn’t be more pleased with how it turned out. I made a quick trip to his barn to pick out what material I wanted for the shelf (wood or metal), and he finished it up for me. It’s PERFECT!

This past weekend we secured the box by anchoring it to the brick wall (just in case), and then I completed the look by potting some trailing plants and colorful flowers to place in the openings and on the bottom shelf.

This project was more of an “accidental” re-purpose, since my original vision for the nesting box changed from displaying store products to becoming a planter… but the finished product is even better than I imagined! It’s an unusual display and perfect for my patio! Ta-da… the nesting box has been re-purposed, and I can’t wait to enjoy it!

What have you re-purposed lately?

 this recipe immediately comes to mind. It’s simple but tasty and a real crowd-pleaser! I’ve cooked what I lovingly refer to as “Brick Chicken” from holiday occasions like Father’s Day to Monday night dinner… it’s just downright delicious!
 Combine garlic, salt, pepper, lemon juice and rosemary with oil (around 2-3T, enough to make the mixture more fluid than a dry rub mixture). Rub it under the skin of the chicken on the breasts and legs.


